Thursday, April 12, 2012

Repainted, again.

Here are some latest pix from Jeff. Repainted, again. I must say the aftermarket fiber hood (unknown jap brand) really survived after more than 5 years of daily usage. As far as the intercooler, now it looks like a beast that hasnt had any meals for a while.

Mivek4doddle


Tuesday, April 10, 2012

Bigger Throttlebody & Intake Manifold VS ITBs

Currently i am using a stock 4G92 intake manifold and a ported 60mm to 63mm 4G92 throttlebody. Very mild setup to some people i believe. The current scene so far i have seen are either using Honda B-Series intake manifolds or the aftermarket version for Honda B-series.

The closest match fitting (but not plug and play) would be the 4G93 cylinder head. For 4G92 a little work needs to be done to port match the intake ports. Both intakes needs some minor work to fit on the head. Gasket wise you have to custom-cut accordingly.

If i decide to go for the upgrade, i think i would choose the Skunk2 intake manifold together with the biggest throttlebody from Skunk2 which is the 74mm. With the mass "Skunk2" other version (ahem) out in the market, they are awfully cheap and i think i would not want to take the risk especially if i want to port match to 74mm. There are chances the intake might crack during the porting. Why so big if you asked? If i plan to do this right i might as well spend a bit more and get the 74mm and have more "space" for my future upgrade than upgrading/spending twice. But it is not a must if you want to have a plug and play 70mm which is not an issue as long you know your future mods list. 63mm to 70mm is a big upgrade and going 74mm you will start to hear another person breathing under your hood. A piggyback would be compulsary by now by the way.

What about ITBs? There is nothing wrong going the ITBs way as long i have an EMS. EMS is very important if you plan to run ITBs. Having a piggyback aint gonna fulfill your dreams and you will not get the 100% true response and power from the ITBs. You need to get your chosen tuner to tune it well or else you will automatically be added to the all time statistic which is "ITBS, hard to tune".

When it comes to intake manifold, throttlebodies and ITBs, there is no "right" size since it does not state on a piece of sticker with "20whp" when you buy the item. Size, length and tuning will take time and dependable on your healthy engine and also the mods you have done.

If you crave for power, skip this post and swap your displacement to at least 200cc or 400cc more. Swapping intakes or ITBs will not make as much power as swapping blocks and internals.

Those hardcore drivers are  going for oversized intake manifold like the ones you used for a turbocharged cars just to get as much air to their massive setup. There are huge and probably running nothing less than a 80mm single throttlebody.

Here are some sample photos i found online and i am imagining it on my car. Hehe.


There is no dilemma actually. If you know your budget, you know which way to go. In my case, let me sleep on it and see what i decide soon.

Mivek4doddle

Mivek4doddle Project Rear Boot Conversion


For the last many years i have been running spoiler-less/wing-less. Aerodynamically, it felt light on the rear and on high speed. Car felt like it wants to take off from the ground and my balls were starting to float in the cabin.

For quick drag it was fun especially when you dont run with godzilla horsepower
under your hood but for stability purposes, this need to take into account.

On top of that, to so-called complete my CA4A Mirage Cyborg kit, this was the last
missing link. Initially i wanted just the spoiler alone but when i recalled the past,
i remembered that the velcro and double sided tape used to fix the spoiler
on the hood from the factory was dead tight from the factory. With the price
of the spoiler alone versus the entire rear piece, the price was not that far fetch
and knowing the fact that these dont come often nearby, i decided to purchased it.

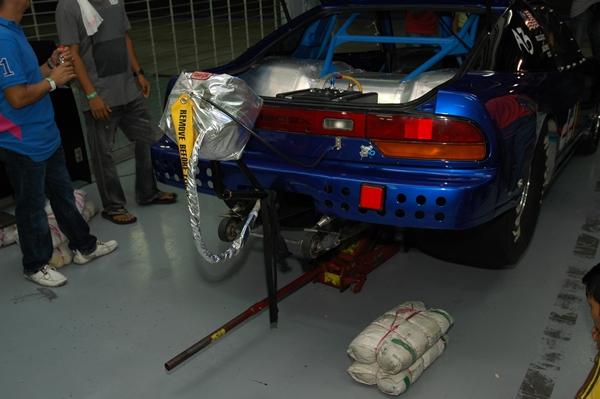
First and foremost, it was heavy. Had to bring my wing man for the purchase else
i'll be dragging the damn thing alone.

Another dilemma was the rear wiper. As i wanted to have that "clean" look, i remembered during my DC2 days when rear wiper was necessary. Come to think of it with the weather this days, i better keep it. I had to buy a used Mitsubishi original rear wiper switch to fit on my dashboard.

As i wanted to bring this to the workshop and ask them to fit, my buddy gave me
and idea to do DIY. It was almost midnight and we have 2 people trying to figure to unbolt the old boot and bolt the new boot. Brilliant.

Swap was completed in 1.5 hours. Took 2 guys to do it with less power tools. The
boot without the spoiler and rear wiper motor was already heavy, now u can imagine
with the spoiler and the wiper?! Fuck is the best word i could think.

If anybody wants to do DIY, either u have 4 guys or just pay for the labour at the workshop. No need to be macho or scrooge here. If the glass breaks during fix, that is another story.

All i need to do next is to go find the electrician and wire up the cables.

Everything was fitted nicely. Entire kit is completed now.

Things you need to know :
- The mitsubishi rear glass is cromax (the ice tea look minus the tint)
- Spoiler comes with a brake light incase you do/dont have one
- Boot has a water sprinkler (which im not fixing it)
- Rear wiper. Good for tropical countries. Haha.

Mivek4doddle

Mivek4doddle Project Disc Brake Conversion (Part 2)

Parts bought during installation day :
- Used CA4A front complete knuckle X2 (factory)
- Used CA4A rear complete trailing arm X2 (oversized cross drilled rotors)
- Bendix CT (front & rear)
- Bendix Dot4 brake fluid
- Used CA4A complete rear anti-roll bar
- Used CA4A handbrake cords

Parts bought earlier :
Goodridge steel braided brake hoses

Parts installed earlier :
Used Mitsubishi VR4-RS brake master cylinder

This upgrade was supposed to complete around 2 hours but
it went up to 4 hours. The front swap was quick but the rear
took quite sometime as my mechanic (him doing it alone) found
that some stuffs needs to be changed like the rear wheel bearings
and also a repair kit for the rear caliper pumps (for safety sake).

On top of that he did a quick clean up and scrubed the rear rotors
to ensure the surface was clean from rust and other old grimes. Dismantled
every bit on the rear trailing arm and knuckles and identified all dead parts.
Cleaned and did a mini refurbishment on the trailing arms. I noticed the
differences between the trailing arm thickness.

The steel braided hoses and new pads fitted nicely. Bendix Dot4 fluid was being used
and he had to bleed every side of it to ensure there wasnt any air swimming around.
Wheels were fitted back and we ran a couple of rounds. Job completed after 4 hours
(excluding lunch break).

The bill today was rm1XXX. I shall not disclose the exact amount as used parts
and labour vary in different places and no point getting into a kiasu argument on
whom got the cheapest deal or got the worst one.

Frequently Ass-ed Questions :

(1) How do you feel as in butt feeling when u drove just now?
Brakes better than before. Need to get use to this new braking feeling.

(2) Where can i get the Goodridge hoses? And are they good than APP/Pro-RS/etc?
Contact Chris at Pentagon for Goodridge products. When i have the chance to
try other brands i will let you know.

(3) Why did you not go for twin-pots like Evo 3 or even other used 2-4 pots from other car brands?
This project has to fit into my lightweight 14" rims. Now i have less than 1/2 inch
clearance. Just nice. For the mentioned twin-pots and etc, i need bigger rims and
tyres which adds more to the budget.

(4) Front normal and rear cross drilled?
The used front cross drilled were sold.

(5) Why didnt you swap with a new and bigger anti-roll bar to save cost and time?
This car did not come with an ARB and i do not know if this factory size is "sufficient" for my supermarket journey. So let me try and evaluate and upgrade as i go along my needs.

(6) Since you took everything down, why did you not swap any bushes with Super Pro?
That is already on my list. Stay tuned peeps.

(7) Why Dot 4 brake fluid?
Google Dot 3 vs Dot 4 vs Dot 5

(8) Any plans in the future to upgrade the pads and front rotors?
When the time comes, yes.

(9) If you had bigger rims, say 17", which overkill setup would you go for?
Brembo 4-pot from the EVO 6.

(10) Any tips u can share?
Good tyres help. Crossed rotors are like cucumber slicers and dont blame the pads.

Project Disc Brake Conversion Completed.

Mivek4doddle


SDB Round 1 2012